skip to main |
skip to sidebar
This week I'll be sharing the instructions for a quilt I'm making for my nephew, Jackson. It all started with this fun fabric - Central Park by Kate Spain for Moda - I just love the variety of creatures, everything from acorn nibbling squirrels and tiny turtles to elephants and giraffes. As usual when I purchased the fabric I really didn't know quite what I was going to do with it.  There were a number of companion fabrics, but the only one that came home with me was this great lined olive-y green.
 I added some dots and a woven-look fabric to make it interesting - but I didn't want them to take over.
 I wanted to add punch to the already great colors on the animal print - solids. To make easy work of capturing the teal-y blues I though I'd give this panel a try - Nuance from P&B Textiles - 6 solid colors on one width of fabric - perfect!
  I added a few more solids to the mix so I'd have a number of options at my disposal.
 Here's the start to Jackson's quilt - 4 blocks, each measuring 10'' square finished. The plan - make 4 sets of the four different blocks, stitch them together and then finish it off with an interesting border. I'm going to switch up the colors in each of the quadrants, keeping certain aspects of every block consistent to tie them together visually. I just love the colors. Take a closer look at each block - - -
 This is my Read to Me Mama block - a stack of books!
 This block was inspired by a block I saw last week at Tallgrass Prairie Studio. I loved the basic design and knew it would be perfect to join this quartet of blocks - this is the only block that is exactly the same in each foursome. I call this block Daddy's Tie - - - why???
 Well, because it looks like a tie - I assure you my tie restrained husband would have never worn this tie.
 This block was inspired by a quilt top I saw at Oh Fransson last week - it's my Timberframe block - I'm planning on stitching the frame section in a faux bois pattern. The dark taupe fabric used for the frame is consistent in every block. The center features a squirrel or turtle.
 And last, but not least, my Squared Rectangle block - features a guest from the menagerie, and is highlighted by a marquis of dotted fabric. This is the block I am featuring today - instructions included!
  I started prepping my fabric this weekend for a sew-a-thon today.
 Here is the fabric for my Squared Rectangles all set to go.
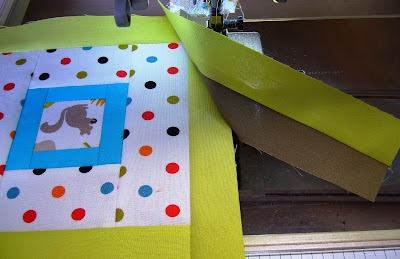
 These blocks go together quickly - the directions instruct you to sew the vertical sides on first, and then add the horizontal strips of fabric.
  Chain piecing will really let you breeze through the construction of the blocks.
 When you chain piece always keep you needle in the down position.
 Why??? It keeps the feed dogs down, and the down position of the needle prevents the sewn fabric from shifting forward.
 The addition of the dotted fabric is consistent for every block - it really adds a marquis-like appearance to the block.
 Want the instructions for the Squared Rectangle block - click here! Tomorrow - Read to Me Mama block instructions.
I'm an ardent followers of Colette Patterns' blog. For the past few weeks I have been following their Fabric Series - a review of different fabric types - what they are structurally and what they are best used of in terms of sewing, and how to handle them.
Today the blog features quilting cottons - check it out - and take the time to read the comments - they are as informative as the post. 
Down to business in the diet department - a long winter and not much exercise has done damage - bikini season is right around the corner - - - hahahaha - - - there once was a day, three sizes away, thin thighs, flat tummy, no one to call me mummy!!!
Nevertheless, time to get serious - after all, I am a dietitian - I need to get into dietitian shape. This past week I made three fantastic recipes from the April issue of Cooking Light - this was tonight's dinner - Mediterranean Barley with Chickpeas and Arugula - vegetarian, delicious - I used farro in place of the barley - 360 satisfying calories per serving.
 I also made the Scallops with Spinach and Paprika Syrup - amazing - so easy, and only 313 calories per serving! This is now one of my all time favorite recipes for scallops - dinner guests will be raving!
And lastly, Chicken and White Bean Soup - such an rich and flavorful soup at 335 calories per serving - perfect for lunch or dinner. Tomorrow night I'm trying the Thai Chicken Salad - it sounds great.
I've got a lot planned for the blog this week - I'm going to feature a block a day Monday - Thursday highlighting the four blocks I'm using in my nephew's quilt - it is so cute!
Then all of the calories I've saved this week eating light will be consumed in one massive feast Saturday night - - - a blow out dinner party - Mexican themed - - - I'm making GOAT - that's right, goat birrya, along with 5 other courses - - - it's gonna make your mouth water!
If you're like me, the quest for interesting blogs to inspire my creativity has become an obsessive pastime. Well, this morning I hit the mother load, the piece de resistance, the cat's meow, the veritable icing on the cake - I found Elsa Mora - artist extraordinaire!!! This is one of those links where you need to make yourself a cup of tea, or pour yourself a glass of wine, find a comfy chair, turn off the electronics, and indulge - - - it is pure beauty, beginning middle and end! And, there is so much to see!
I was lured to her site by some images of her paper cutting pieces - Scherenschnitte as I call it. Here is one example - the detail is amazing!
But her paper cutting only scratches the surface to her creativity. Her website contains galleries of her artworks, drawings, dollhouses, jewelery, flowers, porcelain, paintings and dolls.
And, if that is not enough to just blow you away, she maintains four blogs in addition to her primary blog - one on paper cutting, one on handmade dolls, another on miniature books, and lastly one on her personal style - - - bottle that "personal style" and it would sell for top dollar! How anyone can keep up with 5 blogs and create at her level astonishes me! I'm exhausted just thinking about it.Do not skip her personal story - it is so captivating - a true story of inspiration! Hope you enjoy - have a great weekend!
 I've included the full instructions here for the 10'' finished block, but her are some photos to walk you through the steps. I changed up the color of each block based on my color scheme, but kept the turquoise and dotted fabric consistent in each block. The construction is log cabin-ish, building your way around the center square.
 Here are the blocks waiting for their Lincoln logs - the turtles and squirrels.
 The sides of the timberframe construction are done first - sewing them to the bock as a pre-fab unit.
 When it comes to adding the top and bottom Lincoln log units you need to be careful to match your seams correctly!
  All matched up and ready to sew!
 Failure to match your seams correctly results in this - not good!
 Here's a finished block - so cute!
 I even fussy cut the corner squares to run the lines on the fabric diagonally.
  Remember - you can get the instructions for the blocks in Jackson's quilt here!


