 I drive a Bernina Artista 200 - purrs like a kitten. Let's be honest here - I admit to having more than one machine - what if one breaks and I am in the middle of something - believe me - I've tugged every heart string on my husband's conscience and wallet to bring new machines home. Over the years I have collected a slew of various feet and attachments for my machines and honestly, I've never used some of them. The Circular Embroidery Attachment, or kreisstickapparat as Bernina likes to call it, was one of those attachments that had never been freed from the box. Truthfully - I really wasn't sure what it did.
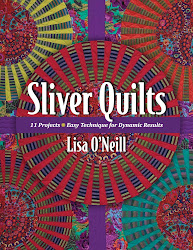
Then the need arose - I promised my friend I would make a quilt for the quilt gallery in her soon to be published book - more exciting news on that later. I was to follow one of her patterns but could alter slightly to show how to manipulate the pattern. I chose to add circles - to a bed quilt - a lot of circles - and they had to be appliqued to the quilt using a button hole stitch - by machine - this is not one of my strong points. My initial attempts took a perfectly good circle and turned it into an egg. Then I remembered the kreisstickapparat - or CEA (circular embroidery attachment).
FYI - no fusing of circles for me - I don't particularly like to fuse, and I really don't like it on bed quilts. I cut out circles and basted around them by hand (while watching TV - I should have been knitting). Once basted, I replaced the cardboard template and pulled the basting thread to cinch. A quick press using starch gave me a beautiful circle to start my applique.


I set up the attachment per instructions - yes I used the stinking instructions and Bernina's tutorial (http://www.berninausa.com/product_detail-n26-i172-sUS.html). You can adjust the CEA to change the size of the circle you want by simply sliding the guide. Your fabric attaches to the CEA, with the sharp, protruding pin which will scratch your hand every time if you are not careful - this pin acts as the axis. I was using the buttonhole stitch and found it easy to adjust my stitch during sewing by moving the needle position left or right a tic or two if my circle was slightly off at certain areas - no one is perfect. In about 30 seconds you can sew a perfect 3 inch circle.


Bernina suggests the use of stabilizer - I did not use it and had great results. I suppose if you were using this as intended - to embroider stitching onto a single piece of fabric - you would need the stabilizer. I however I had 3 layers of fabric - background, the circle and the turned edge of the circle - and the power of spray starch! Ta Da! Love this attachment!
What's for dinner tonight - Puebla Chicken and Potato Stew (http://www.epicurious.com/recipes/food/views/Puebla-Chicken-and-Potato-Stew-109026). Stopped by Talula's Table in Kennet Square last week and picked up some of their house made chorizo - should be great in this recipe.


1 comment:
I've got my rainy day sewing machine fund going and HATE it when its in the shop. Its always mid project. One of these days I'll bite the bullet, shell out the dough, and buy another one. At least my hubby's hobby of home theater isn't exactly cheap either. :)
I loved seeing how easy it was for you to do a circle. My attempts always end in eggs too so I'll have to keep your machine in mind! Thanks for sharing!! ~Christine
Post a Comment