skip to main |
skip to sidebar
Arghhhh!!!
I am busy with a quilting project - and, yes, I'm attempting feathers again - - - arghhhh!!!
I'm doing as much plucking as sewing!!!

I found this new notion earlier this week at Hinkletown Sewing - Wrap and Fuse Piping by Clover. I've been toying with adding piping to a current project so I thought why not give it a try. If you're curious, I paid $5.25 for 2 meters. It's simply piping encased in fusible.
 What could go wrong - - - I'll tell you what could go wrong - - - fusible and my brand, new iron - - - yikes!!! I like living on the edge! I buy cheap irons - they never last for me - this is a Classic from Black and Decker.
 The instructions called for using a strip of bias cut fabric - I read that after I used a non-bias cut and was determined to plow forward despite my inability to follow instructions as written. All you do is wrap the fabric strip around the fusible, pin, pin the wrapped piping to your ironing board, and iron the flat edge, avoiding the piping.
  Perfect, and no goo on my new iron - even more perfect! This is what you end up with - a perfectly wrapped piping. And it worked fine with the non-bias cut fabric strip!
 I sewed it into place using my zipper foot - keep in mind - this is just a sample. The zipper foot worked just fine.
 And, presto! It works beautifully! I am very impressed with this product - I actually hope they make a few different sizes - this gives a 3/16'' piping. It certainly gets the thread from the edge seal of approval!
 I'll tell you what else gets my seal of approval - the menu from last night's meal plan - - - Fettuccine with Mushrooms and Hazelnuts - - - it was delicious!!! I made a few changes to cut the calories a smitch without sacrificing any flavor - - - I roasted the hazelnuts in the oven without any butter, and was able to decrease the fat by half. I also only used half the cheese they suggested - it was more than enough cheese and really shaved off excess calories. I served it with a simple salad - delicious and filling, and so quick and easy!
I'm giving all the credit to Kit Lang from Diva Quilts for this link - she posted it at her blog today and after being completely mesmerized by the site I knew I had to share it too.
 The site is called Tag Galaxy- it is such a fun way to wander through the virtual world in photos - you will love it. When you get to the site it will ask you for your first tag search - type in "quilt" - when your galaxy appears, click on the center orb for random photos of quilts, or click on one of the rotating planets to explore other aspects of quilting.
 Following the menu plan for the week - I'm giving a thumbs down to last night's dinner - the Chicken Fried Rice with Leeks and Cranberries - sorry - just not good - too many cranberries and not enough chicken. Tonight's dinner - Roasted Root Vegetable Hash with Parsley Pesto and Poached Eggs was delicious - two thumbs way up!
Boston in January - yuk!!! Sorry Boston - but this just isn't pretty! I was in Boston this past weekend taking my daughter back to college and this was what greeted us - and winter has just begun. The welcome wagon didn't stop with the disgustingly dirty snow and unplowed roads - - - oh, no - - - while she and her roommates were home for the holidays their apartment was burglarized - they kicked down doors, took the TV and rummaged through all of their belongings. Welcome to Boston! Both of my girls are back at college now - the house is so quiet - I really miss the chaos!
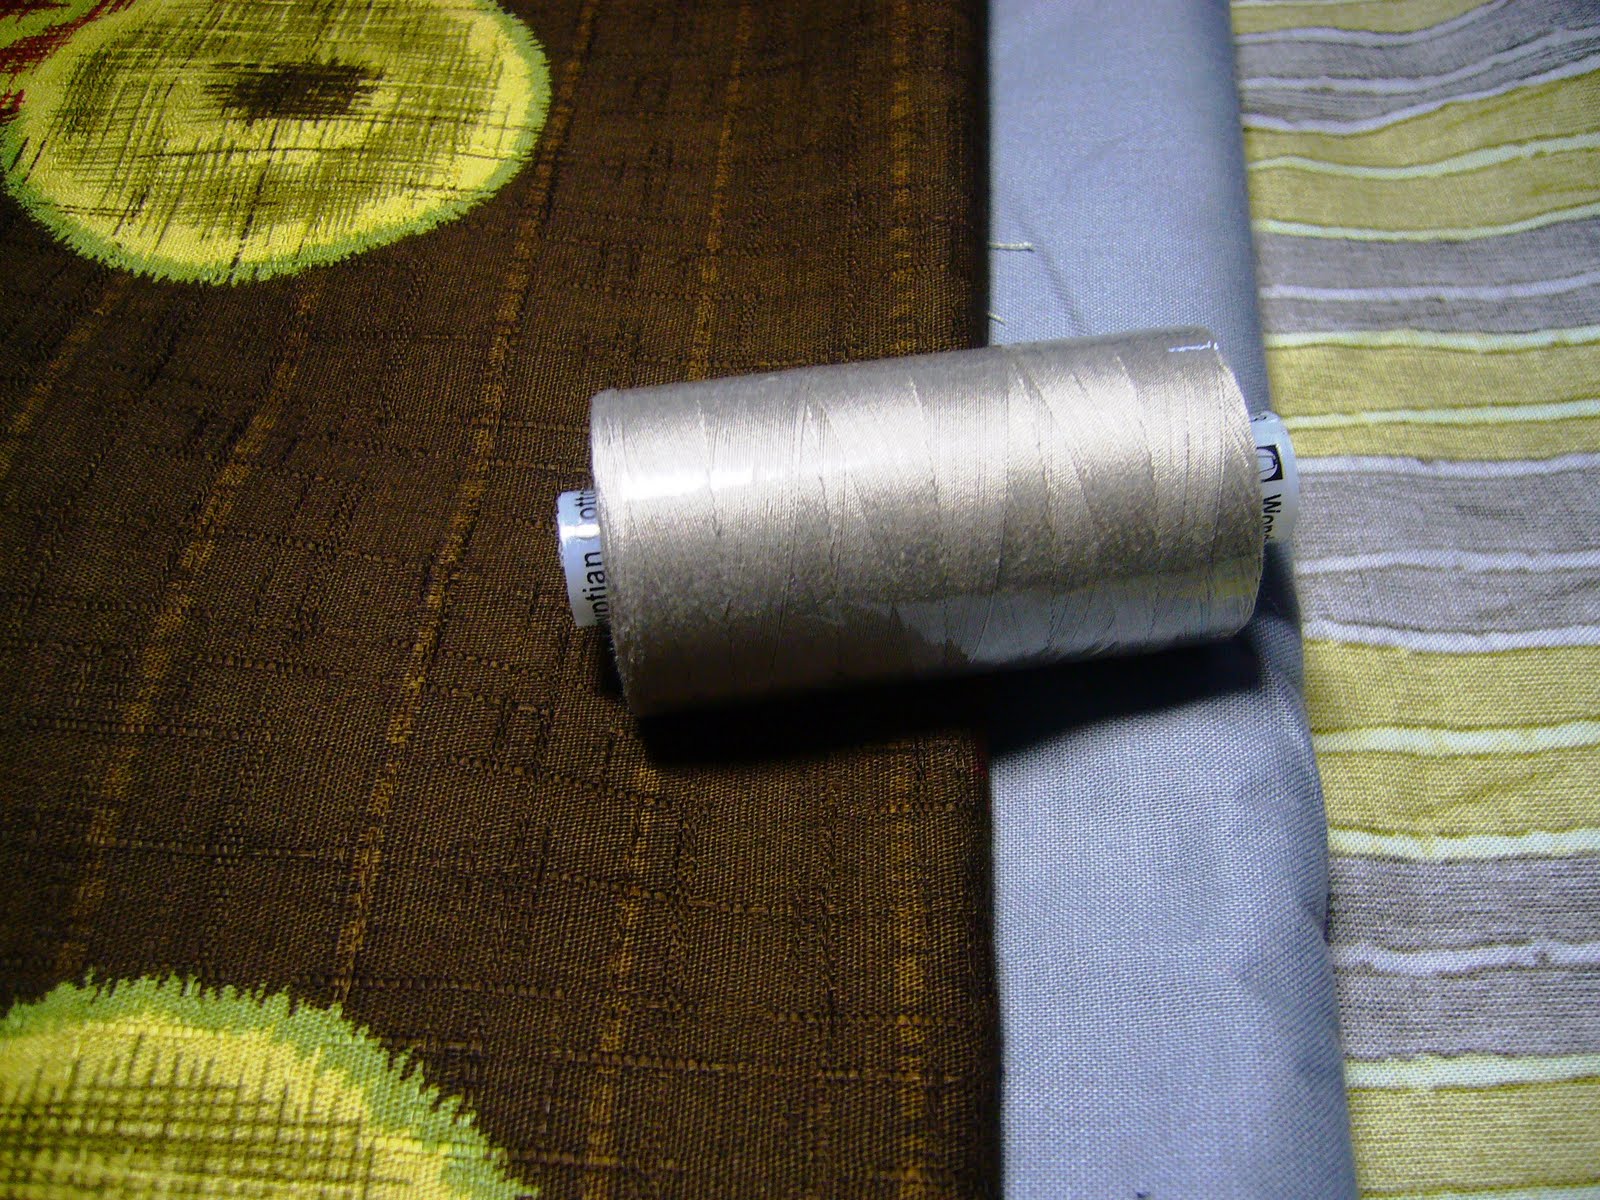
My trip was not a complete loss. I'd been planning for sometime to visit some quilt shops that are located on my route from Philly to Boston, and I finally had the time this trip to fit in a few stops. One shop in particular was really great - The Quilter's Alley in Ridgefield, Connecticut, outside of Danbury, just minutes off of Route 84. It's not a big shop, but it has lots of personality, and a fantastic collection of contemporary fabric and imported fabric. I purchased this interesting Japanese fabric - a rich dark cocoa punctuated by circle motifs and the occasional leaf. I'm showing the clothespin so you get an idea of the scale of the print.

Here's a close up - the texture is beautiful - very reminiscent of bark cloth. I wish I knew who made it! I also bought yardage of this beautiful fabric by Marie Kelzer for Westminster Fibers.
 They also carried the full (or near full) line of RJR solids - I cannot find that in any of my local quilt shops - they have the nicest hand of all of the solids. I really need the swatch card for the RJR solids so I can order them on-line - - - I e-mailed RJR to see how I can get my hands on one - - - will let you know! I bought yardage of gray to finish a baby quilt.
And, I'm trying a new thread - WonderFil Konfetti - their 50 weight - in a neutral gray. The shop owner gave it her highest endorsement. This was my first stop at this shop, but not my last - they had such a beautiful collection of fabric that, despite the quantity of quilt shops in my area, I just can't find this eclectic collection close to home. Unfortunately they do not have on-line sales. What am I going to do with this fabric - not sure - as soon as I decide you'll be the first to know!
Gotta go - need to make my dough for the Onion Focaccia for dinner tonight - you can cook along - just visit my Sunday post for the recipes all week long.
 I saw the King's Speech today - it was magnificent - Colin Firth and Geoffrey Rush were amazing in their roles. The other standout for me was the set designer. Did you see it - - - did you notice the walls??? The wall treatment and the wallpapers were so beautiful - - - they could turn everyone of them into a fabric and I'd buy it! I'm all set for the Golden Globes tonight - and yes, I really hope the King's Speech takes a few home.
I'm focusing on cooking for today's post - a week's worth of dinners featuring relatively light and healthy options. I'll admit I haven't tried most of these recipes - but I will be following the meal plan this week and will give you my opinion on each recipe. Eat along if you like! Many of the recipes come from the January / February Cooking Light - it's that time of year - I've got to cut the calories and find some physical activity to do despite the snow - arghhhh!
Sunday: Celery Root Bisque and Beet, Blood Orange, Kumquat and Quinoa Salad. We had this tonight and loved the salad, but were not crazy about the soup.
Monday: Bacon-Flower Soup from Aarti of the Food Network and Onion Focaccia (from this month's Everyday Food - recipe not available on line)
Tuesday: Chicken Fried Rice with Leeks and Dried Cranberries
Wednesday: Root Vegetable Hash with Poached Eggs and Parsley Pesto
Thursday: Fettuccine with Mushrooms and Hazelnuts, Tossed Salad
Friday: Dinner out!!! After all, I cooked all week!!!
The December / January issue of Quilting Arts magazine has an article on Metal as a Surface Embellishment by Mary Hettmansperger, the third in a series - I'll admit I didn't see the first two. Seeing the article made me dig out an experimental piece I did a few years ago - - -  Right - 2007 - - - February 2007. It was a mini quilting challenge to create a small piece out of non-fabric materials. I embraced the challenge and had something in mind from the minute it was announced.
  About a year before I had purchased this beautiful lamp on Ocracoke Island, off the coast of North Carolina. I don't remember the name of the artist who created it but I just love it. It's in my powder room, and yes, those are still Christmas decorations to the left - - - I'm moving kinda slow this year getting them put away.
 Here's a close up of the shade, oxidized metal mesh, held in place with brass brads. The whole process intrigued me - this was my inspiration.
 Here are 7 of the 9 "blocks" I made for the challenge entry - originally I had them mounted on black wool off-set by a contrasting bronze synthetic fabric. I wasn't too happy with 2 of the blocks so I dismantled it and will reset it some day.
  Here's a closer look at the blocks and how I created them. Many of the materials I used were borrowed from my husband's work bench. This square of brass mesh is topped by another metal mesh, held in place by some wire from his bag of electrical tricks.
 This is the wire mesh I used for the background - I used a brass mesh for all of the blocks, the copper mesh is still in the package, but I assure you, not for long!
 And, yes, it performs as advertised - you can cut it (not with your fabric shears, please), and sew it - with your sewing machine (I used a 90 needle). It is so cool!
 This block is set up like a 9 patch, and features another cool metallic product - - -
 Leaf metal - adhered to the wire mesh, and sewn into place. The center is a brass eye.
 Here's a block using more of the larger mesh, leaf metal and - - -
  The unexpected, peacock feathers woven into the metal mesh.
 I love this block - why - the fuses - those little cylinders tied to the background with wire - they are so interesting. I oxidized the brass mesh for this block, giving the rainbow like coloration.
 How do you achieve the oxidation - my creme brulee torch to the rescue! You can't be functionally fixated - you need to find multiple uses for your stuff! What a great use for the torch!
  Be careful if you plan on giving this a try - these torches get white hot!
  Here's a sample of the brass mesh oxidized.
 And, here is the copper mesh - I love this one - I can see a new series of blocks made from the copper mesh to compliment the brass blocks.
 This block uses those cute little gear-like washers and brass brads.
 There are so many cool supplies at the hardware store that translate into this application - I've just begun to scratch the surface.
 Don't forget to explore metal sewing and craft supplies!
 This block features snaps! THe white mesh is drywall repair mesh.
 Snaps come in all sizes and colors, rivets are fun too!
 And for this last block I picked used a picture hanger, on the front - it's interesting.
  I loved the challenge 4 years ago and this article has inspired me to re-visit my fascination with metal and sewing - the possibilities are so intriguing.

 I was quilting at warp speed today - in that hypnotic trance where you, the quilt and the sewing machine are moving as one - then that "safety" pin jumped out right in front of me and - - - POW - - - it became impaled on the machine's needle. Never did this before!!!
  I'll blame the pin stabbing on my poor aching back, shoulders and hands - - - all the shoveling and snow blowing have taken a toll on my quilting form. Perhaps you haven't heard about the storm - - - the one that dumped 18 inches of the white stuff yesterday - - - it's beautiful, if all you have to do is look at it.
 Oh - - - more snow tomorrow - just when I thought we had enough!
 Enough, seriously!


